Showing posts with label nail design. Show all posts

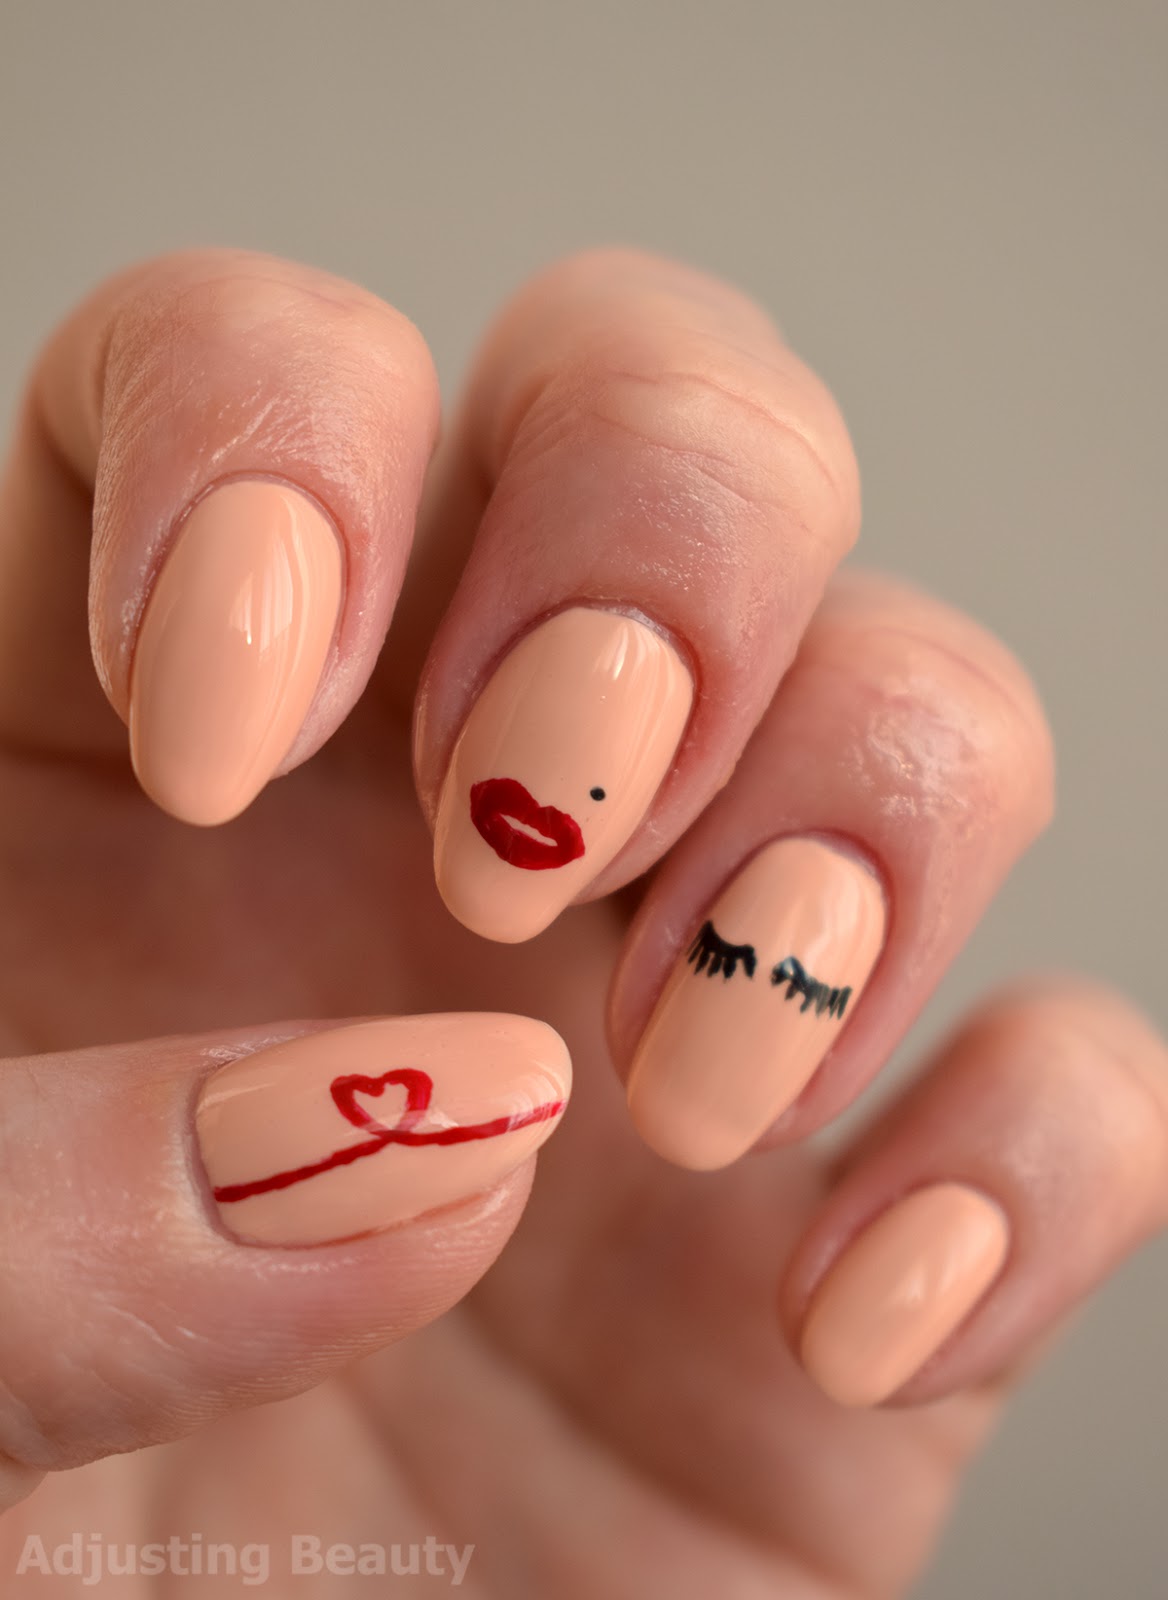
Makeup Lover Nails

I have been seeing lashes design on nails everywhere. I saw this combination of lipstick with lashes somewhere, but I can't find the author. It's definitely not my idea, but I wanted to try it out. I also paired it with a ribbon heart to represent the love of makeup. 


Christmas Rudolph Nails

I realized I haven't posted any reindeer Christmas nail design on my blog, but I'm pretty sure I did it already on my nails. I had some spare time and decided it was time to do it now. The holidays are here. I call it Rudolf inspired because of the red nose. Red, gold and green is just a classic and my favorite Christmas combination. 

Fall Orange Nail Art (Collaboration with Katja Nail2express)

I finally got back to doing more nail designs. Part of the reason is also me going to nail courses, because it's another field that I want to better myself in. Today's nail art is in collaboration with Katja who writes Nail2express blog. Her blog is all about nails - nail art, nail polish reviews and some really useful nail tips. Definitely check it out, she will help you find inspiration for your next manicure. I personally admire her stamping nail designs, I've tried this once and gave up on it. It's harder than it seems.

Marble Nails

I've just been loving marble design on everything lately, especially paired with blushing pinks. My first attempt at marble nails was a disaster, so I looked up some of tutorials on YouTube. I used the same technique that Kristin Gardner showed in her tutorial. I think it definitely made it look the most realistic with the littlest of effort.

Kissy Nails

I once did lip design on my nails, but I never posted that manicure on the blog. So I decided to do this lip design again, but on nude base which I really enjoy these days. I got a lot of compliments on this manicure and everyone seemed to think I stamped it on, but it's actually a free hand design.

Tropical Palm Leafs Nails

The tropical palm leaf design has become really popular. I really like this design on cushion covers and other home decor products. Tropical designs also tend to flood clothing stores as soon as warm weather comes. It's colorful and very much summery. I wanted to recreate this design on the nails as it seemed really easy to make and it is.


For the base I chose and off white shade, because it looked the most neutral to use with all the green shades. You could also use a pink base and make it more colorful. 


I decided on using three different greens to create different colored leafs. I chose a very light almost lime green shade, a true dark green and a petroleum green to give it some more dimension. Then I used a striping brush and drew two lines to mark where the leafs will be. I started drawing the leafs by creating different colored strokes. It's really easy to make and looks good without too much effort. In fact, if you're not great at drawing and you make it more messy, it will just look more artistic. 


I let the design dry down and then I went over it with a high shine top coat to seal in the design and make it look more even.  


This is one of the rare summery design that isn't too colorful and it's actually quite wearable. It's also fairly easy to recreate as you don't need to be as precise. 


Products used:
Barry M Gelly Hi-Shine Nail Paint - Coconut
Avon Nailwear Pro+ Birthstones - Peridot
Avon Gel Shine Nail Enamel - Pined-Perfection
Avon Gel Shine Nail Enamel - Jaded Sky
Seche Vite Fast Drying Top Coat

Plaid Nails

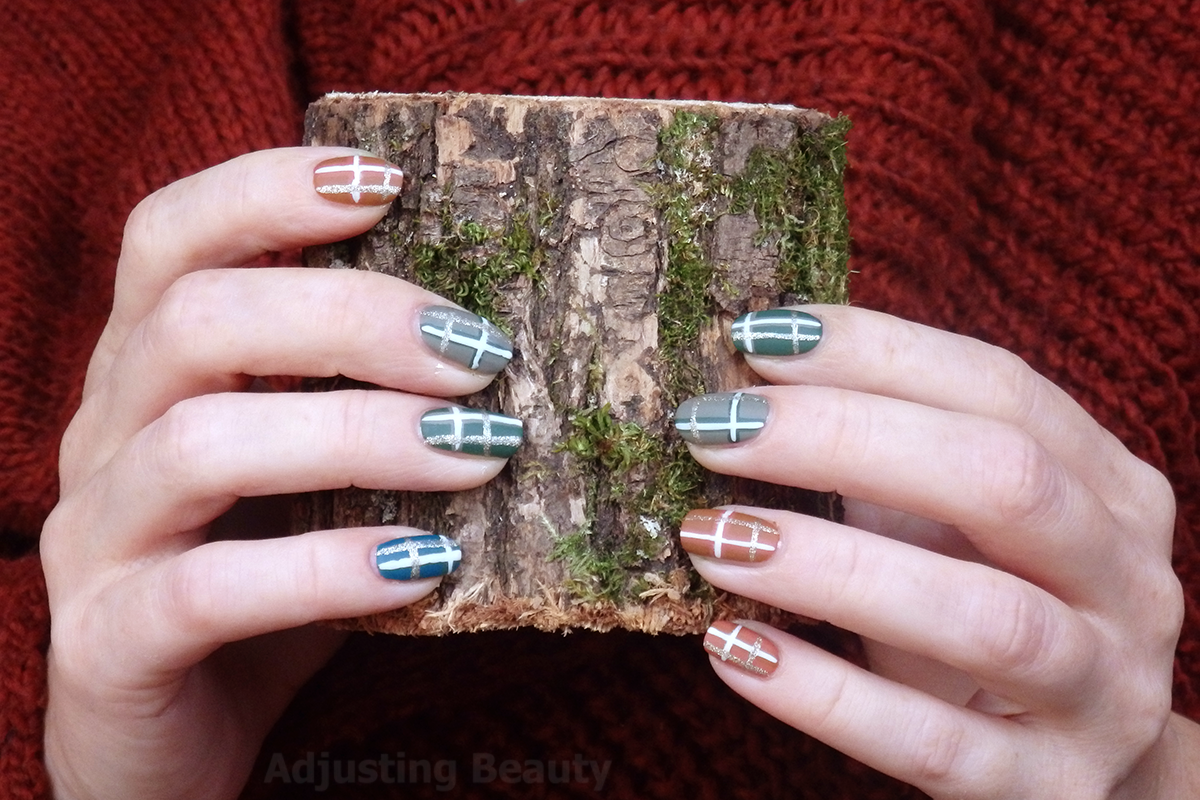
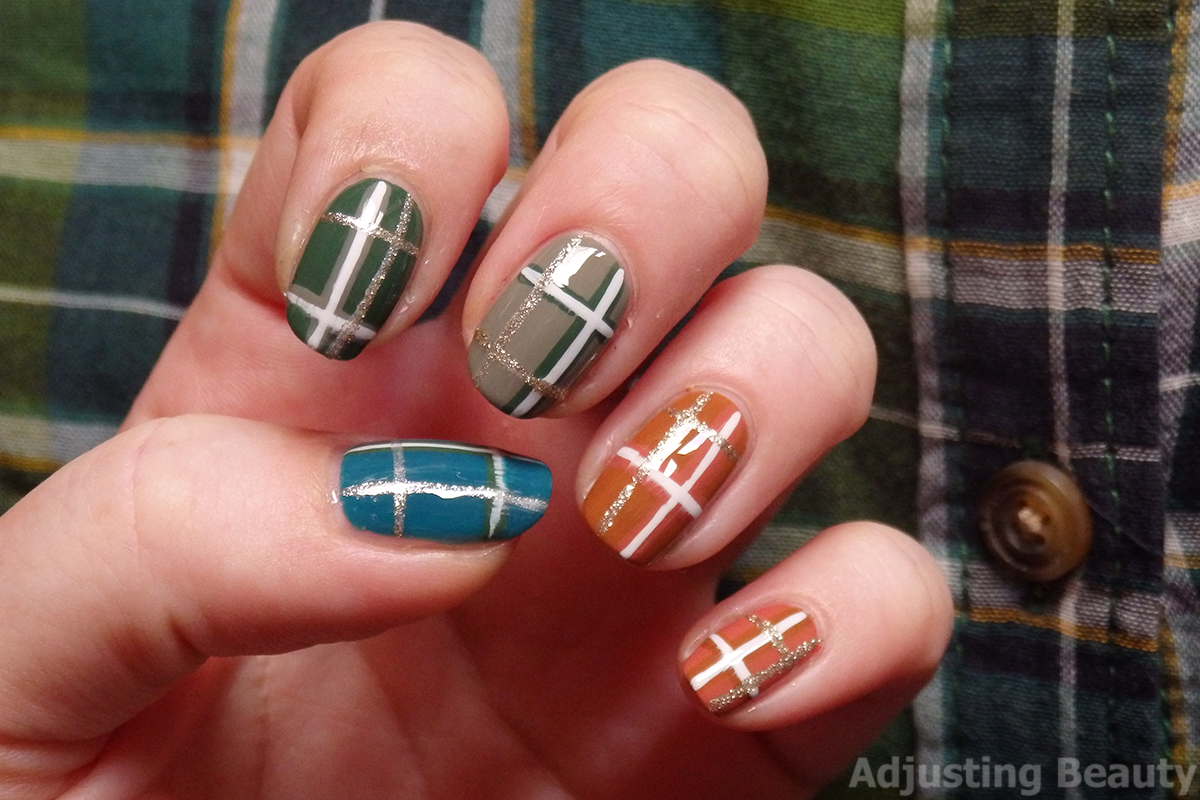
Plaid shirts are synonym for fall. They look simple and go with everything. I have a collection of few at home and was wondering how plaid would look like on my nails. Straight lines are the hardest for me to achieve, because I don't use stencils or nail tape and I can't draw straight line for the life of me. But I actually like this look on my nails, so I decided to post it in all its imperfection.


For base colors I chose an array of typical fall shades. I applied different color on each nail polish. Here I used Avon Gel Shine Nail Enamels in: Jaded Sky, Pined-Perfection, Stonewashed Clay, Marmelady and Rouged Cider.


The rest of the design is pretty much all straight lines. I did them with a stripping nail brush. If you're even worse in creating straight lines than I am, I suggest using nail tape or just regular tape and peeling it off before the nail polish dries up.


I took shades that were similar to the base color and created a wider cross. I alternated were two lines met on different nails. On some, cross was a bit upper, some lower, on the side, in the middle and so on. Then I used white nail polish (Gel Shine Nail Enamel - Iceberg White) and added another two lines inside of the cross, but this time making them thinner. 

I decided to pair all design with another cross of gold nail polish (Avon Magic Effects Molten Metal  Nail Enamel - Gold). This cross I tried to position opposite of the previous one.


Then I applied regular top coat (Avon Gel Shine Lasting Finish Top Coat) to seal the design. If you apply top coat too quickly, it can smudge the design. Be patient and wait a bit. Especially, if you applied thicker coats of nail polishes. 


Because shiny just didn't look as pretty as I thought, I went over it with a matte top coat (Kiko Matte Effect Top Coat). Interesting what a difference finish can make. It looks so much more interesting and flat, like a shirt. 


I like this look for a bit of color in the fall. It can look very interesting, but it's not hard to do, if you have some patience. There's no actual drawing involved, just adding some lines all around your nail. 


Cute Matte Valentine's Day Nails

Hey Beauties!

Since Valentine's Day is approaching, my Pinterest has been filled with all kinds of hearty nails. I promised that this year, I'll do more nail art, so I have the perfect excuse to bombard you with some cuteness inspired by Valentine's Day. 


I started by painting all my fingers with a pastel purple nail polish, except thumb and middle finger. Those I painted a muted white color.


Thumb: I started drawing on red lip shape. Then I added a few of those in pastel purple shade and made them smaller. I also added black little hearts. I draw it all using a doting tool. As you can see, it's no the most precise design. Then I stupidly decided to draw lip cracks and in all honesty, it would probably look better without that step. But I always say, if you look from far away, it's fine.

Middle finger: I used a striping brush and drew on a love sign. One letter at once. The curves are hardest for me, but if you take time, it all goes fine. 

Ring finger: Over the pastel base I applied a glittery pink nail polish. It has pink, purple and blue glitter parts. Over it I also applied nail polish with very small gold shimmer.

Index finger and pinky: On those I just applied one gold heart stud. 


I applied matte top coat over all nails except ring finger. The glitter should stay shiny, so I used a regular top coat over it.

Here are the products that I used for this manicure.

Avon 5 in 1 Nail Treatment (base coat)
Maybelline Color Show The Blushed Nudes 447 Dusty Rose (pastel purple)
Berry M Gelly Hi Shine Coconut (muted white)
Maybelline Colorama 15 (red lips)
Maybelline Color Show 677 Blackout (black hearts and love sign)
Avon Magic Effects Liquid Sequin Glitterati (glitter base)
Catrice Million Styles Gold Effect! 07 Unfold The Unlimited Gold (gold glitter top coat)
Kiko 3 in 1 Mat Fortifying Fast Drying Base and Top Coat (top coat)
Seche Vite Dry Fast Top Coat (top coat)


I used dotting tool from essence and their Tip Painter, which I just use the brush as my striping brush. I also added gold heart studs from stud wheel from Born Pretty Store. 


It's a colorful mash up of all the things that to me look super pretty and I wanted to feature them in this Valentine's Day nail design. It's cute, but also a bit less classic, because of the matte finish. Pretty nails make me happy, although I don't always have the patience to do these designs. 

Today I'm also introducing to you my fellow bed lover - Fluffy :).


Do you like these sorts of cute nail design or do you prefer to go one color?

French Revival Nails (Spring 2016 Nail Trends)

Hey Beauties!

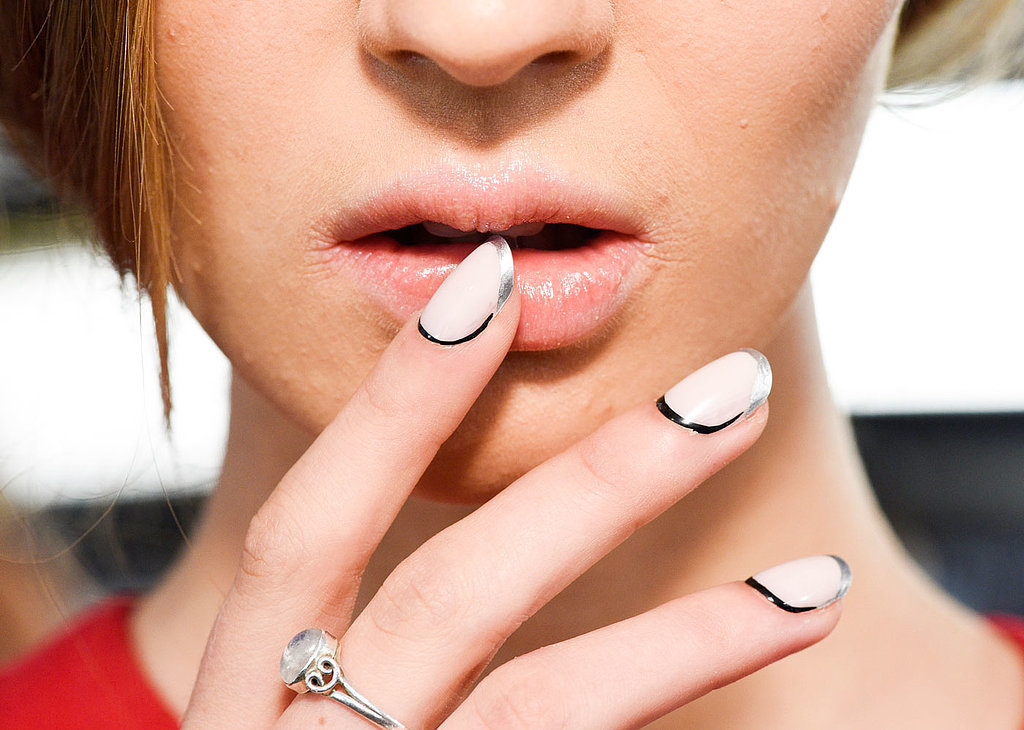
I am already getting into a spring mood, although I still like to pull out darker shades every now and then. I was browsing for some inspiration and I wanted to see what are spring 2016 nail trends. The one that caught my eye, is the french revival. I saw some very interesting french tips, but metallic ones with black outline around the skin, looked the most challenging. Of course, I had to try to recreate it. The inspiration is from Johnathan Simkhai Spring 2016 fashion show (the photo is from here).


Original shades are pretty classic with white, metallic silver and black. I wanted something warmer, so I went for light peachy pink, metallic gold and black.

I did took photos in between the steps that I did, but it's pretty self-explanatory. I applied two coats of light peachy pink shade on all my nails. Then I took metallic gold nail polish and just applied it with the brush that it comes with in a french tip kind of way. My nails are a bit straighter cut, so the effect is not the same as if you have rounder nail tips. After that I took a black nail polish and with a thin striping brush I went around the edges of my nails, trying not to get it on the skin or leave any white space in between the nail and skin. This is the hardest part for me. Black nail polish looks uneven and trying to apply it as close to the skin and as straight as possible, is well, difficult.


The end result is pretty interesting, although it may not be for everyone. I guess it sort of looks like you've gotten some dirt between your nails and the skin. At least my dad thinks it looks like that - men! If you don't like it with the black outline, you can always just do the color all over and metallic tips, which also looks pretty interesting and a bit different. 


Of course, I also tried to recreate the pretty pose on the photo so here are some of my oh-so-natural hand placements. 


I'm really interested in what you think about this trend? Would you wear it?


Products used:
Kiko Nail Lacquer 507 Blush
Essence LE Metal Glam Nail Polish in 04 Gold Digger
Maybelline Color Show 677 Blackout
Seche Vite Fast Drying Top Coat

Fall burgundy gold geometric nails

Hey Beauties!

Nail art is not my forte. Let's just go with it. I always say that practice makes perfect, so I still practice and wait for it to become perfect. If you ask me to do a straight eyeliner line, I can do it. But when it comes to anything else and drawing straight lines, I am complete rubbish at it. So please, bare with me. 


I've been seeing this geometric nail design all over Pinterest and I really liked the black and white versions, but I decided to go for a fall color scheme. For the base I used probably my favorite fall nail polish shade, Maybelline Colorama in 261. It's a deep almost black burgundy. 

Then I used a very thin stripper brush and made two dots in the center of the nail (well I tried!). Then I drew two lines from the sides of the center of the nail and joined them in the lower point. I did the same two lines and joined them in the upper dot. I finished with a line across the nail, just a bit down from the top of the nail. 

For the lines I used metallic gold nail polish, Essence LE Metal Glam in 04 Gold Digger. 


I know my lines are horrible. I am more comfortable drawing design or doing anything else, but lines and especially straight lines are my nightmare. Still, I wanted to share this manicure with you, because I think it actually looks pretty descent, when all the nails are done. I like the color combination and the geometric design. 


You may have already seen this manicure in my Red purple fall makeup


White matte negative space manicure

Hey Beauties!

You've seen a glimpse of this manicure in my Asian inspired makeup post. Negative space manicure.. I think that is how it's called. You basically leave some space out with no nail polish and create certain patterns. I think this has become a rather trend since this year, so I wanted to try it. It's not my finest manicure, but I like the idea of it.


I had the chance to use my Essence Holo Stripes Nail Art Stickers, which is basically a thin tape that you can tape on the nails and create designs with it. Of course you can leave it on the nails, but I just used it as a boarder. If you have thicker tape, you don't need to do as I did, because I needed two lines in order to get bigger negative space. I just cropped the tape and stick it on in the V shape. 

Also, I did use a base coat, because I stained my nails with one of the nail polish and wanted my nails to look really neutral for the negative space, but you can skip this, if you'll be using light shades of nail polish. I used Alessandro Pro White Effect Polish.

Then I chose the nail polish with the biggest possible brush (wrong!)  and tried to fill in only the top V space and the rest of the lover space. I used Sally Hansen Complete Salon Manicure in 171 Bleach Babe. Trust me, get a different smaller brush and probably the nail polish that doesn't dry quickly.

After that I just removed the tape. I would advise you to remove the tape a few seconds after applying the nail polish. Because if the polish gets too dry, like in my case, you won't have a crisp line. Also try to fold tapes so that you get perfect V shape, you'll see I wasn't so good at that.


For an extra fun effect I used matte top coat over it. I've been using this Kiko 3 in 1 Mat Fortifying Fast Dry Vase and Top Coat all the time. Any manicure looks so much better with matte finish. That's just my personal preference, you can totally skip this. But do put top coat over it, to seal in the design you just made. 


I admit my execution is not as nice as I thought it would be, but I still wanted to post this. If you recreate it, I would love to see your photos. I love the idea of the negative space manicure. How about you?


Gift wrapping my nails

Hey Beauties!

I haven't done any nail design in a really long time. Partially, because most of them don't really succeed. Yesterday, I had the urge to  do something and this idea came to me, with the help of Catrice on YouTube - where I saw this video.  I hope you like my interpretation. 


I used Maybelline Colorama nail polish in 303, which is a very light neutral beige color. I applied two coats.


Then I used Sally Hansen Complete Salon Manicure nail polish in 171 Beach Babe. A white nail polish, with which I created dots. I tried to space them as neatly as I could, but let's be real, I can't do a straight line. 


I used my Essence doting tool - the smaller dot. 


Then I took striping brush and Maybelline Colorshow nail polish in 677 - black, to create these little bows. 


I started by making something that looks like a mustache. I then rounded each side to create sort of a 8 shape. Then I wanted to thicken up the upper line, if I didn't do it so before. I then added two little stripes to finish the bow. I like to call them "organic" bows, because let's be honest, they're not particularly precise.


To finish the design, I used top coat and of course it wouldn't be my manicure, if I didn't smudge at least one nail (argh!). I still like how it came out. Even if it is really girly and cutesy, which is not really my style. How about you? Do you like that kind of designs?