Avon je ena izmed mojih najljubših znamk. Njihove izdelke uporabljam že leta in pri njih tudi kupujem določene izdelke, ki so stalnica v moji rutini. Današnja objava je nastala v sodelovanju z Avonom in je zato napisana v slovenščini. Namenjena je vsem vam, ki zjutraj raje spite, kot pa se zbudite eno uro prej, da bi ustvarile makeup. Prikazala vam bom mojo verzijo 15-minutnega makeup za službo, ki ga lahko osvoji vsaka in z najmanj truda doseže največji učinek.
Showing posts with label tutorial. Show all posts
All Creams Natural Makeup
7 Feb 2018
This is a natural makeup look that I tried to create with mostly just cream products. Cream products will look especially nice on slightly drier or older skin. Powders can often times look more unnatural as well as lot more intense, so using creams for a more natural look is obvious. I love a good bold look, but I've also been loving wearing something more natural. Here emphasis is on glowy natural looking skin with a bit of definition and minimal eye as well as minimal lip.
I started by applying my usual skin care routine - toner, serum and a fairly hydrating glowy moisturizer in these colder months. Then I also used primer. If you have oily parts, like I do, use something that will mattify the skin and fill in pores. I used that on my t zone and a bit around my cheeks where my pores are bigger. You can also use illuminating primer, which I used only on the top of my cheeks and above the brows. This will give your base a bit more of that healthy sheen.
Then I applied BB cream all over my face in a light layer. Because my cheeks tend to have more redness and visible capillaries, I went over them with a bit more product. This evens out your skin tone and makes it look fresher, especially, if you use a BB cream that has that healthy sheen to it. BB cream also usually has less coverage and skin care ingredients in it, which makes it look more natural. But you can use a lightweight foundation too.
After that you need to assess the situation. If you see anything that needs to be lighter or covered up, use a bit of concealer. I have deep set eyes and my inner corners can look really dark, so I used color correcting concealer to conceal out that purplish tone in the inner corners of my eyes - upper and lower. On top of that I applied higher coverage concealer, but tried to use it lightly. Don't overdue it, because you'll ruin the natural look to the skin. I also apply a bit of concealer around the tip of the nose, where I have redness, corners of the mouth, chin and in between the brows. These are all my areas that tend to get redness through, but you conceal only what you feel you need to. If you want to look fresher, also conceal right around your lower lash line which is often times more red than the rest of the skin.
I always set concealer with a bit of powder, especially under the eyes which prevents it from creasing. For that I use a tiny amount of transparent powder that just soaks up excess moisture, but doesn't look cakey or gives it any additional color. If you have oily parts, put some powder there too. For me this is around the tip of the nose, a bit on the forehead and on the center of the chin. Those are the areas that I know will get greasy as the day goes on. If you're skin is dry and you don't get greasy through the day, you can skip powder.
After we've evened out the skin tone, we need to put some more definition back to it. If you have naturally defined cheeks and don't need to define any part of the face, you can skip this step. I used creamy grey toned contour shade to contour a bit under my cheek bones. This makes my cheeks stand out more. I also have wide and high forehead, so I also always contour on the sides of the forehead as well as a bit around the hair line. If you want to define your jaw line, use a bit of contour also under the jaw bone. I also have wider nose tip, so I try to fairly add some contour there too. Always have makeup sponge next to you to blend out, if you've overdone it. It should look natural, like a natural shadow. My trick for making the makeup look uniformed is also to apply a bit of that contour across your lid, but concentrating it under the brow, not on the mobile lid. This gives a slight definition to your eyes without using any powder eyeshadow.
![]() |
BB cream, concealer, powder and cream contour |
Next I move to brows. First I brush them through with a transparent gel or mascara like gel. If you have thick brows, that is all you need to do. However, if you have fair and fine brows like I do, you need some additional help. I mixed two colors of creamy eyebrow shades and drew on little hair like strokes where I wanted to fill in my brows. The point is to not make it too perfect and completely filled in. You want to still see the texture of hair, but just give them nice shape. Because I have bold spots, I also use very thin creamy brow pencil to fill those in additionally. After I do that, I also brush through my hairs with another transparent brow mascara. By brushing the brows up they look fuller, messier and in general more youthful. Giving your eyes sharp arch or drawing your brows in a very thin line, makes you look older and sometimes angrier. Bushy brows are popular for a reason, they look youthful.
One of the most important steps at natural makeup is curling your lashes, if you don't already have them naturally curled. It opens up the eyes and makes you look more awake. Eyelash curler is my favorite makeup tool. I used volumizing mascara, because my brows are not super long nor thick, so I need help. I applied two coats on my upper lashes and only one coat on my lower lashes. My lower lashes are fairly long, so I don't apply mascara all over them, because I want upper lashes to be the center of attention. If you want even more natural looking lashes, apply mascara mostly around the roots of your lashes. This will make your roots look darker and fuller, but avoid putting it on the ends of lashes, because it can look more unnatural. If I go for a no eyeshadow look, I prefer a more fuller lash look, but you can skip it, if you have good lashes already.
![]() |
BB cream, concealer, powder, cream contour, brows and mascara |
After that I go back to my skin. One of the easiest ways to look glamorous, fresh and healthy is to apply creamy highlighter. Highlighter brightens up your skin and gives your that youthful glow. I used a mix of champagne (more pink based shade) and mixed it with a slightly cooler whiter champagne, just to make it really pop. You can go as heavy or as light, as you want with the highlighter. I like it heavier, but since I use cream highlighter, the texture looks much more skin like and not too obvious.
I apply highlighter with fingers. Make sure to blend the edges, so it looks as natural as possible. For that you can use clean finger or dampened makeup sponge. I apply highlighter on tops of cheeks - also a bit closer to the nose for that round cheek look, above the arch of my brows (if you have a lot of lid space, you can apply it under the arch of the brow, but if you have hooded eyes avoid that, because it will only make you look more hooded, instead apply on top of brows), in between the brows and slightly along the nose (but not down to the tip, because I have long nose in general), on the cupid's bow and on the inner corners of the eyes (this opens them up and makes them look brighter, avoid this step, if you have eyes that are wide apart, instead apply it only on the center of the lid).
![]() |
BB cream, concealer, powder, contour, brows, mascara, highlighter |
Another very important part that makes you look alive and healthy is blush. Blush has been in the makeup game for years and for a good reason. It's that instant pop of color that freshens up your complexion. I also used creamy blush in a muddy brownish mauve shade which is very close to my natural redness of the cheeks. The more natural color you use, the more natural it will look. You don't have to be too precise with it in order to achieve natural look, just follow your natural redness of the cheeks. Again, creamy texture will blend into the skin seamlessly and look much more natural than a powder.
![]() |
BB cream, concealer, powder, contour, brows, mascara, highlighter, blush |
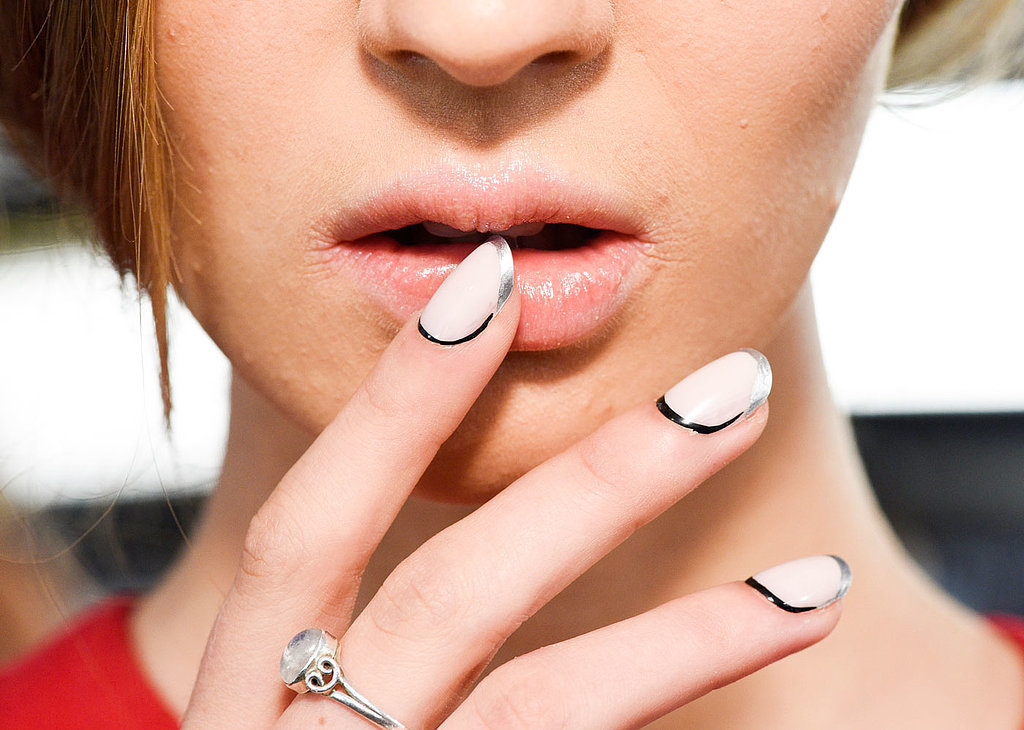
If you have vibrant natural lip color, you can just apply lip gloss and you're done. But if you're like me and your lip line is a bit blurred, you can use lip pencil in similar tone of your lips and just slightly define the edges. Blend it out with a q-tip to make it look more natural and less defined. Then I used a bit of that creamy blush and applied it on the lips. It makes the whole look come together in a similar tone. I also used a bit of sheer pink lip gloss on top to make the lips look fresh and juicy.
This is a simple natural, yet still defined, makeup look that will suits anyone as long as you adjust it to your features and skin tone. You can create this look in under 20 minutes, because you can basically apply all cream products at once and just blend it out well. I've done this already, when I was in an extreme rush. Cream products are also easier to blend, because they don't require any specific brushes or skills. I think it's a great everyday fresh natural makeup look.
If you want to spice this look up for an after work occasion or any other occasion that requires you to look more colorful, I'd say choose a good bright red lipstick and apply it on the lips with fingers or a lip brush. Diffuse the edges with a q-tip for a more effortless and modern look, like you haven't tried too much. I guarantee you it will look well put together with minimal effort.
This is just what I like, when it comes to natural. It may be way too much for some or too little for some. But I like to define my smaller eyes, add some contours to my face, as well as make the skin as glowy as possible. I'd love to hear what is your definition of natural makeup. Let me know in the comments.
Products used:
Avon mark Magix Face Primer
Oriflame The One Illuskin Face Primer
Missha Perfect Cover B.B. Cream - 21 Light Beige
Look by Bipa Matte Camouflage Concealer - 010 Light
Catrice Camouflage Cream Anti-Shadow
Paese Rice Powder
Maybelline Mastercontour Studio - 01 Light
L.O.V. BROWtittude Brow Gel Serum
Avon Mark Perfect Brow Creme Gel Pot - Deep Brown + Freedom Makeup Eyebrow Pomade - Caramel Brown
Catrice Slim'matic Ultra Precise Brow Pencil - 03 Dark
Catrice Lash Brow Designer Shaping And Conditioning Mascara Gel
Beyu Beauty Queen Volume Mascara
Kiko Radiant Touch Creamy Stick Highlighter - 100 Gold + Colourpop Super Shock Cheek - Flexitarian
H&M Pure Velvet Cream Blusher - Cameo Brown
Catrice Lip Foundation Pencil - 030 Addicted To Cafe Au Lait
ItStyle Lipgloss - 09
Avon True Colour Perfectly Matte Lipstick - Ravishing Rose
Tropical Eyes Makeup
25 May 2016
Hey Beauties!
I get stuck in my neutral zone and I often use lighter shades on my eyes, especially when I have lighter hair like I have now. But since some of you commented that you seem to like darker shades on me and because I've been getting so much inspiration from makeup artists on Instagram, I finally did something colorful again - well colorful in my terms. You know me, I am always more of a wearable type of makeup lover, but that doesn't mean that I don't enjoy combining colorful shades. Today's makeup is just that.
I started my eyes with a skin like matte shade all over the lid. Then I added taupe matte in the crease. I deepened it with matte dark brown. I also added matte petroleum shade to make it a bit more blue and green.
Then I added shimmery greyish blue on the center of the lid, but left out the inner part of the lid. There I went in with shimmery yellow toned green to make it look more tropical and less just blue. I also used taupe, brown and petroleum on the bottom lash line, but only in the outer corner.
In the center around lower lash line I applied turquoise khol to give some life and pop of color. I also added shimmery yellow green on the bottom and I applied shimmery light gold in the very inner corner of the eye. For eye liner I went with dark navy blue.
I finished the look with mascara. False lashes felt like too much, since I wanted this look to be wearable and for you to actually see the shades on my lid.
When I was deciding how to call this look, it just seemed very tropical to me. Shades of warm greens and blues are always on my mind when I think of paradise. Even though this is a bit darker look, I still think it reflects that mood.
Since eyes are fairly bold, I used BB cream for some luminosity and lightness. I covered imperfections with liquid concealer and powdered my face with loose powder. I also thought it would be only appropriate to bronze up the skin, if the look is tropical. For that I used matte warm bronzer. I contoured just a tiny bit and that was my cheekbones and nose. I also used metallic light gold highlighter on tops of cheeks, nose bridge, Cupid's bow and on top of brow arch. For blush I went with a mix of redish peach and brownish peach to look in tune with my hair color and not to overpower my eyes.
On the lips I used a very neutral lighter brown shade to make the eyes focal point. Obviously you can go bold on lips. Some orange reds would look amazing, but I wanted to keep it wearable and a bit understated.
Products used
Face:
Missha Perfect Cover BB Cream - 21
Catrice Liquid Camouflage Concealer - 005 Light Natural
E.l.f. HD Powder - Sheer
Essence LE Light of Orient Bronzer - 01 Sunkissed Beauty
Essence LE Metal Glam Highlighter - 01 Gold Digger
MAC Pinch Me + H&M Pure Radiance Powder Blusher Brown Sugar
Eyes:
Avon true Colour Matte Eyeshadow Quad - 1
Freedom Makeup Pro Decadence Palette Today's Tonight - 14
theBalm Nude'tude - Sleek
Avon True Colour Eyeshadow Quad - Precious Shells 4
Zoeva Mixed Metals - Ore Stone
Zoeva Mixed Metals - Neo Brass
Makeup Revolution Ultra Professional Eyeshadow Flawless - Angel
Avon Khol Eye Liner - Turquoise Waters
Avon Khol Eye Liner - Cobalt Blue
Maybelline Lash Sensational Lash Multiplying Mascara - Intense Black
Brows:
Freedom Makeup Eyebrow Pomade - Caramel Brown
Lips:
Born Pretty Store Charming Lipstick - 17
Oznake:
colorful,
eye makeup,
eyes,
green,
makeup,
makeup look,
tropical,
tutorial
French Revival Nails (Spring 2016 Nail Trends)
7 Feb 2016
Hey Beauties!
I am already getting into a spring mood, although I still like to pull out darker shades every now and then. I was browsing for some inspiration and I wanted to see what are spring 2016 nail trends. The one that caught my eye, is the french revival. I saw some very interesting french tips, but metallic ones with black outline around the skin, looked the most challenging. Of course, I had to try to recreate it. The inspiration is from Johnathan Simkhai Spring 2016 fashion show (the photo is from here).
Original shades are pretty classic with white, metallic silver and black. I wanted something warmer, so I went for light peachy pink, metallic gold and black.
I did took photos in between the steps that I did, but it's pretty self-explanatory. I applied two coats of light peachy pink shade on all my nails. Then I took metallic gold nail polish and just applied it with the brush that it comes with in a french tip kind of way. My nails are a bit straighter cut, so the effect is not the same as if you have rounder nail tips. After that I took a black nail polish and with a thin striping brush I went around the edges of my nails, trying not to get it on the skin or leave any white space in between the nail and skin. This is the hardest part for me. Black nail polish looks uneven and trying to apply it as close to the skin and as straight as possible, is well, difficult.
The end result is pretty interesting, although it may not be for everyone. I guess it sort of looks like you've gotten some dirt between your nails and the skin. At least my dad thinks it looks like that - men! If you don't like it with the black outline, you can always just do the color all over and metallic tips, which also looks pretty interesting and a bit different.
Of course, I also tried to recreate the pretty pose on the photo so here are some of my oh-so-natural hand placements.
I'm really interested in what you think about this trend? Would you wear it?
Products used:
Kiko Nail Lacquer 507 Blush
Essence LE Metal Glam Nail Polish in 04 Gold Digger
Maybelline Color Show 677 Blackout
Seche Vite Fast Drying Top Coat
Oznake:
french tip,
metallic,
nail art,
nail design,
nail trend,
nails,
pink,
spring 2016,
trends,
tutorial
Romantic Siren
29 Oct 2015
Hey Beauties!
A few days ago I got a wonderful package from Avon cosmetics - see here. As soon as I got my hands on their Supershock Vivid Liquid Eye Shadows I had an idea to use them in this look. The look was inspired by Kiko's Limited Edition called Midnight Siren. I wanted to use liquid eye shadows to create hypnotizing inviting gaze that sirens should embody. Sirens are mythological beings of the sea. They were said to be beautiful and lured nearby sailors with their music and voices to shipwreck. I find that very interesting and a great idea to recreate for masquerade or Halloween events, if you want to go with something more subtle and romantic.
I always say that my makeup looks are simple, but this really is. Anyone can do this, no excuses.
I used 7 shades of Avon Supershock Vivid Liquid Eye Shadows. You can use cream eyeshadows or just go with metallic or shimmery powder eyeshadows. It's more about the shades, although I love the metallic effect of these liquid ones.
I started by applying stark blue silver shadow into the inner corner of the eye. I added light pink a bit more towards the lid. Then I used dark violet in the first part of the lid and left some space in the center. I moved on to the outer part of the eye and used emerald green. I also connected it to the bottom lash line. Then I used gold based olive green in the center. I also added a bit of burgundy shade in the crease to connect dark violet and emerald. I used the same shades on the bottom.
I didn't really blend these out, because I wanted to keep the intensity. The whole look is more like a painting technique and it's just a lot of shades with metallic finish put on one lid. The messier the better in my opinion.
I skipped the liner. Instead I used fluttery long natural false lashes and applied them close to the lash line. I put on some mascara and eyes are done.
For the sake of this being a bit more shimmery and hypnotizing, I also used some nail rhinestones and glued them under the arch of the brows and around the outer corner of the eye. I also used one small one in the inner corner of the eye, to make them pop.
I used the same liquid eyeshadows on my lips. First I used the emerald green one all over the lips. I also added stark blue silver in the very center of the eye, which created a little ombre.
You can use cream eyeshadows or lipsticks and go over them with silver and blue powder eyeshadows.
On my face I used foundation, concealer and powder. I also used cream light gold highlighter and heavily highlighted cheeks, on top of brows, nose, Cupid's bow and chin. I went over it with silver powder eyeshadow to intensify it. I used blue shimmery powder eyeshadow to contour sides of my face and nose. I also went over contours and highlights with emerald and silver liquid eyeshadows. Just to get the same color all around the face.
If you decided to recreate this, you can also wet your hair for a better effect. You can even use oil on your hair. It will give you the same wet effect plus you'll be giving yourself an oil mask for the whole evening - two in one.
Products used
Face:
Catrice Nude Illusion Foundation - 010 Nude Ivory
Catrice Velvet Finish Concealer - 030 Velvet Beige
Rimmel Stay Matte Pressed Powder - Transparent
Essence Soo Glow Cream To Powder Highlighter - 10 Look On The Bright Side
Catrice Prime and Fine Professional Contouring Palette - 010 Ashy Radiance
Avon Supershock Vivid Liquid Eye Shadow - Sparkling Platinum
Avon Supershock Vivid Liquid Eye Shadow - Electric Emerald
Coastal Scents 88 Shimmer Eyeshadow Palette - silver and blue eyeshadows
Eyes:
Avon Ideal Flawless Eyeshadow Primer
Avon Supershock Vivid Liquid Eye Shadow - Sparkling Platinum
Avon Supershock Vivid Liquid Eye Shadow - Pink Party
Avon Supershock Vivid Liquid Eye Shadow - Lilac Lightning
Avon Supershock Vivid Liquid Eye Shadow - Electric Emerald
Avon Supershock Vivid Liquid Eye Shadow - 24K Gold
Avon Supershock Vivid Liquid Eye Shadow - Chrimson Thrill
Born Pretty Store False lashes
Artdeco Adhesive fro Lashes and Sparkles
Maybelline Lash Sensational Lash Multiplying Mascara - Black
Lips:
Avon 3D Plumping Lipstick - Stolen Kisses
Avon Supershock Vivid Liquid Eye Shadow - Electric Emerald
Avon Supershock Vivid Liquid Eye Shadow - Sparkling Platinum
Oznake:
Halloween,
look,
luring,
makeup,
masquerade,
pretty,
romantic,
romantic siren,
siren,
tutorial
Strobing / highlighting and my take on it
2 Jul 2015
Hey Beauties!
I suppose you've seen or heard about strobing. These days it seems to be everywhere. I've seen two YouTube videos on how to achieve the look and have seen many photos of models having an incredible glow. As a person who loves highlighters I had to try the technique, although is basically just highlighting.
As I've investigated, strobing is just another fancy word for highlighting. Some say that strobing should be done with cream highlighters, some I've seen do it with powder highlighters. Contouring and highlighting has been dominating Instagram and the beauty scene ever since Kim Kardashian started doing her fierce contour. Now apparently, we've thrown away bronzer and contour products and just use the heck out of highlighting products.
For this purpose I used cream product, because I wanted to test my new cream highlighter. It's from Born Pretty Store, called Sugar Box Face Shimmer Stick in the shade 02. It's beige pink based cream product with golden shimmer. I still need to write a review of this one, but you can see how it looks like here.
The technique is pretty much the same as with highlighting. You use your usual foundation and concealer and then move to cream highlighter. If you're using powder highlighter, it's best to use some sort of powder underneath it.
You then highlight the usual highlighting areas or all the areas that stick out on your face. Above the brow, under the brow arch, in the inner corner of the eye, on tops of cheeks, on top of bridge of the nose (or down the whole nose or just the tip of the nose), Cupid's bow, top of chin and you can also highlight center of the forehead. I personally avoid the last one, because it makes me look greasy and I don't want to bring more attention to my huge forehead.
The result should be a really nice natural glow accentuating your natural features, without using any contouring or bronzing. As you may see on the photos below it really looks like a well balanced healthy glow. I can't say this would look as pretty few hours later or on oily skin, but I think you got the point.
Here is the difference. On the left photo I only have foundation and concealer and on the right photo I have cream highlighter, cream blush and a bit of powder under the eyes and around the nose.
I personally think that this technique is better suited for those with medium to dark skin tone, because highlighted areas really tend to stand out more, whereas on my fair skin it's very subtle. Of course, it's suppose to look like "your skin", but if you're a highlighter freak like me, you probably want the glow to be seen from space.
I like to use bronzer, especially in the summer, because it gives a bit more color and definition to my pale face. Of course I also use highlighter and the combination really brings out my features. I won't lie that I love how it shrinks my huge forehead. I'll probably stick to using both bronzer and highlighter, but I definitely will try strobing if I leave my bronzer at home :).
So what do you think of it? Do you like the whole finished result or are you gonna stick to bronzer and contouring?
Oznake:
cream highlighter,
highlighter,
makeup,
natural glow,
strobing,
strobing tutorial,
tutorial
Peach Perfect
28 Jan 2015
Hey Beauties!
Peach is probably one of my favorite shades for makeup. I especially love it for blushes and lipsticks. Today's look is inspired by this shade. Pretty much all of the makeup has some shade of peach included.
I put shimmery light peach shade all over the lips. Then I darkened the crease with a warm matte brown. I then added coppery shade on the lid.
On the center of the lid I added the first light peach shade, because it gives the most shimmer to the eye makeup. I also put light vanilla shade in the inner corners and darkened around the lower lash line with matte warm brown shade.
Instead of going for black liner, I choose chocolate brown, to keep the look more warm and light. Then I just added black mascara, since I don't have a brown one.
I used the same shade that I used on the eyes as a base, as a highlighter on tops of my cheeks. For the blush I used a really pretty peach shimmery shade.
I also used peach shade of lipstick to keep the look very glowy.
So, this is my peach shade used almost all over my face:). It's a more wearable look for an everyday occasions and I think peach really suits my skin tone. What is you absolute favorite makeup shade?
Products used:
Face:
Revlon Colorstay foundation
MAC Pro Longwear concealer
Rimmel Stay Matte powder
Eyes:
Essence 3D eyeshadow (Irresistible Vanilla Latte-all over peach, light vanilla)
Avon True Color Quad (Mocha Latte, Shade 2-warm matte brown)
Makeup Revolution Run Boy Run palette (Hide Behind Me-copper)
Elf Cream Eyeliner (Coffee)
L'Oreal Volume Million Lashes
Cheeks:
Essence 3D eyeshadow (Irresistible Vanilla Latte-highlighter)
Milani Baked Blush (05 Luminoso)
Elf Contouring Blush & Bronzing Powder (St. Lucia-bronzer)
Lips:
Avon Ultra Color Indulgence lipstick (Honey Flower)
Subscribe to:
Posts (Atom)